

Building an Airflow Pipeline Part 1
Up and running quickly with a simple HTTP Operator


Airflow Overview
Airflow is a popular tool for orchestrating data engineering pipelines. It simplifies the process of managing chains of tasks that run together that make up a "pipeline".
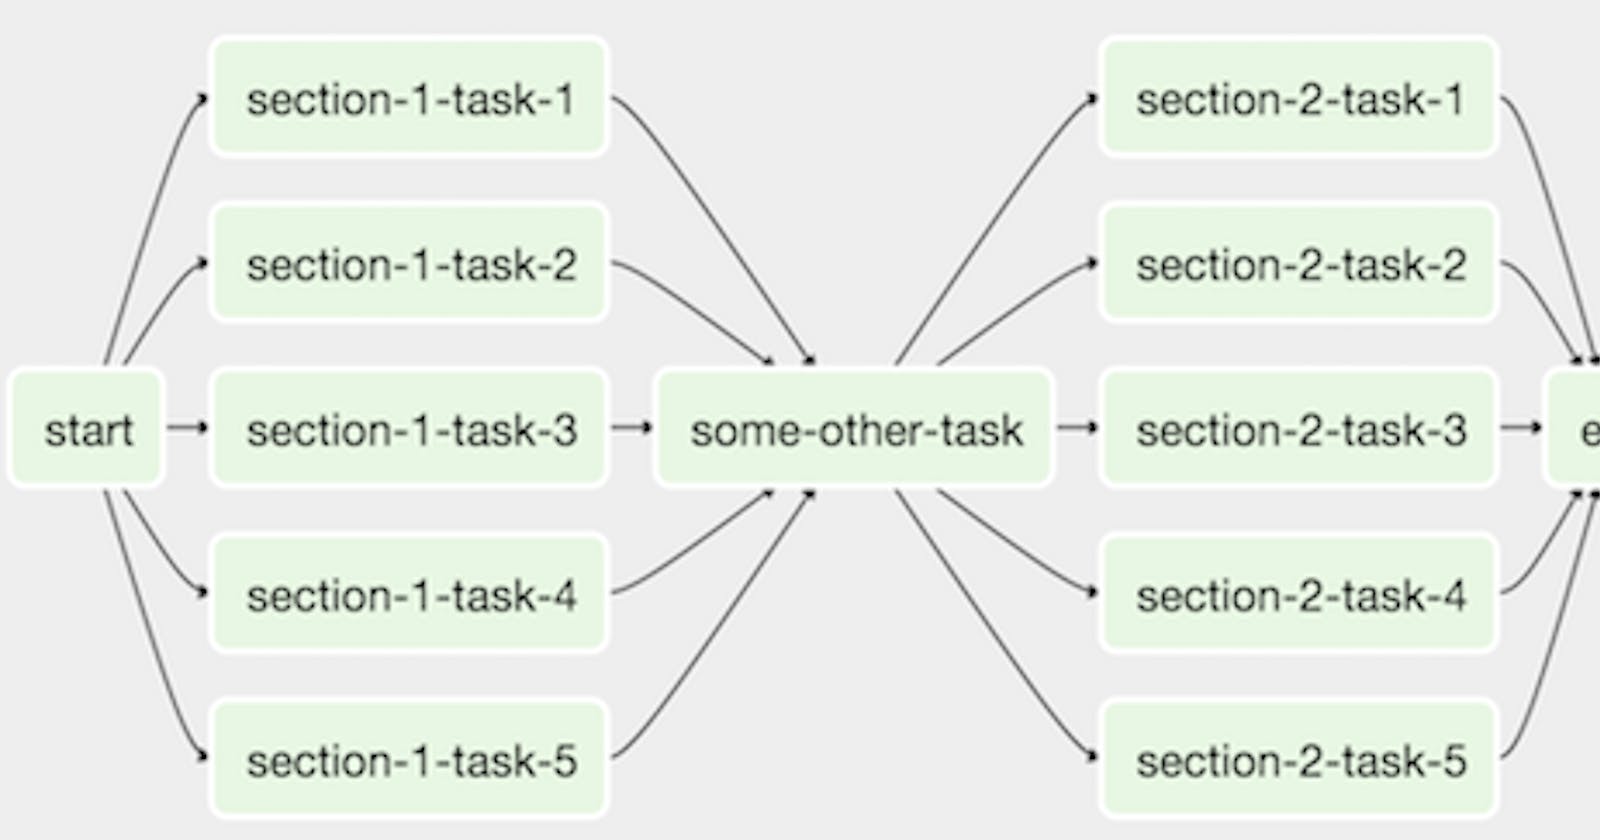
Airflow organizes pipelines by DAGs (Directed Acyclic Graph). This basically means each task is a node in an acyclic graph. And all of the tasks/nodes taken together comprise a pipeline.
First I'll be documenting some high level information about Airflow and its components and setting up the framework for a basic Airflow pipeline. By the end we will have a local dev pipeline set up and posting requests to a live endpoint that you will be able to confirm is working. Subsequent posts will elaborate and expand.
Operators
The components that make up DAGs are tasks. Tasks are generally created by using what Airflow refers to as operators. Operators represent either actions, transfers or sensors.
- Actions: Bash, Python
- Transfer: GCS to BigQuery
- Sensor: FileSensor, HttpSensor
For example, if you wanted to invoke a custom python script daily within an Airflow DAG you could use the PythonOperator from airflow.operators.python. Or if you want to transfer data between two well known sources (say GCS to BigQuery?) you could look up if an Airflow operator exists for them as in this case airflow.contrib.operators.bigquery_to_gcs and import the BigQueryToCloudStorageOperator.
Documentation is your friend in this instance. Every operator has their own set of arguments that need to be passed in order to set up a task in a DAG.
Setting Up Airflow
Airflow can be a beast to get going if you start from scratch. Luckily Apache have provided a Docker Compose file ( downloadable here ) that you can use to get up and running quickly.
Take note of the volume mounts in the Docker Compose. DAGs are expected in a /dags folder. There are also /logs and /plugins folders expected. But we will only concern ourselves with the /dags folder for now.
Creating Our First DAG
This post is going to be uneventful. Sorry. But the cool thing is, we will at least verify that our Airflow pipeline is up and running and that the task we introduce in our pipeline is running.
So the very first thing we do is import DAG from Airflow. This is at minimum regardless of the tasks we wish to run and will be included in all of our Airflow pipelines.
Aside from the initial import, we will set up the block that contains each task of our DAG. The DAG definition below contains a number of arguments that I have elaborated on in the comments. This will be pretty boilerplate for most DAGs apart from some minor differences you'll run into in scheduling or emailing alerts to owners.
from airflow import DAG

default_args = {
    "owner": "airflow",
    "email_on_fail": False,
    "email_on_retry": False,
    "email": "owner@ofthepipelines.tld",
    "retries": 1,
    "retry_delay": timedelta(minutes=5)
}

with DAG("cool_lambda_cloud_function_pipeline", # this is the name of our pipeline
         start_date = datetime(2021,1,1), # the starting date of this pipeline
         schedule_interval = "@daily", # you can also use a cron syntax here
         default_args = default_args, # the dictionary above that contains some data on the owner and whether to email if this thing crashes
         catchup = False) as dag: # do not try to catch up from the start date for missing DAG runs
Once we have imported this we can specify the operators we will be using. In this case we have a Cloud Function (or a Lambda) that we want to run. So we know we want to post an http request to a URI that contains a function we created for some such service. By browsing the documentation and doing a quick CTRL+F for "http" we see a promising one titled "http operator". Clicking into it we can read what we need to provide!
from airflow import DAG
from airflow.operators.http_operator import SimpleHttpOperator

default_args = {
    "owner": "airflow",
    "email_on_fail": False,
    "email_on_retry": False,
    "email": "owner@ofthepipelines.tld",
    "retries": 1,
    "retry_delay": timedelta(minutes=5)
}

with DAG("cool_lambda_cloud_function_pipeline", # this is the name of our pipeline
         start_date = datetime(2021,1,1), # the starting date of this pipeline
         schedule_interval = "@daily", # you can also use a cron syntax here
         default_args = default_args, # the dictionary above that contains some data on the owner and whether to email if this thing crashes
         catchup = False) as dag: # do not try to catch up from the start date for missing DAG runs

    process_lambda = SimpleHttpOperator(
      task_id = "process_lambda", # a common convention is naming the task_id after the name of the operator
      http_conn_id = "my_lambda_function", # your connection id should match the connection you create in the Airflow UI
      endpoint = "/t/okrz8-1637122422/post", # we will be posting a message to this endpoint. Remember the beginning of this URL goes in the connections section in the Airflow UI
      data = {"msg": "This was a message from Airflow"}, # Our message to carry
      method = "POST",
      headers={"Content-Type": "application/json"}
    )
Almost done! You'll note from my comment near the http_conn_id assignment that we have to edit some fields in the Airflow UI.
So visit localhost:8080 or wherever you've pointed your Airflow instance to after spinning up your Docker instance. And follow the following steps:
- Navigate to
Admin > Connections - Hit the plus sign to create a new connection
- In
conn_idtype what youve entered forhttp_conn_id(in this case "my_lambda_function") - For
Conn Typechoose "http" - For
hostenter "ptsv2.com" - Save
Now you are ready to test!
- In your terminal, enter the Airflow instance Docker container
- type
docker psand look for the ID of the Airflow instance. There will be several containers, make sure you choose the one corresponding to Airflow. - Enter the container by typing
docker exec -it ##### /bin/bash - Once inside type
airflow tasks test cool_lambda_cloud_function_pipeline process_lambda 2021-01-01
You should see a response similar to this
[2021-11-17 04:18:47,083] {http.py:111} INFO - Calling HTTP method
[2021-11-17 04:18:47,085] {base.py:79} INFO - Using connection to: id: my_lambda_function. Host: https://ptsv2.com/, Port: None, Schema: , Login: , Password: None
[2021-11-17 04:18:47,085] {http.py:140} INFO - Sending 'POST' to url: https://ptsv2.com//t/okrz8-1637122422/post
[2021-11-17 04:18:47,428] {taskinstance.py:1219} INFO - Marking task as SUCCESS. dag_id=cool_lambda_cloud_function_pipeline, task_id=process_lambda, execution_date=20210101T000000, start_date=20211117T041152, end_date=20211117T041847
All well and good right? Even cooler, head over to https://ptsv2.com/t/okrz8-1637122422 and check out a response from around now to see your message posted to this endpoint from Airflow!
That's it for now. Hopefully this has been a useful overview of how you can get up and running with Airflow and a basic HTTP operator for posting requests with this cool tool.